Wednesday 11 December 2013

More Lawnfawn fun

Hi There!

Hopefully I'm just managing to squeeze in this latest little make for the Lawnscaping challenge this week #71 Tags and Treatbags

My OH took delivery of a bunch of LED light bulbs the other day and they came in packaged in little 4cmx4cm square boxes, my crafty soul soared at the sight of them, lemme tell ya! so this is what I did...

I used Cosmo Cricket 'Golly by Jolly' PPs, Some gold glitter card, a TH Rosette die and the rest is all lovely Lawnfawn die and stamp deliciousness.

Thank you for looking today! I'll leave you with a top view of the box, just for fun..

Wednesday 4 December 2013

Papercraft Christmas Tree

Hi there!

Are you feeling Christmassy yet? Ofcourse you are! I'm feeling a little panicked as I'm not ready at all so instead of doing something sensible, like online shopping for Christmass presents I made this...
I had been toying with the idea of making a tree with some new rosette dies I acquired recently but as soon as I saw this gorgeous tree on pinterest my heart was set!
What's even better is I used a fair fair bit of unloved stash making it, some old Christmas PPs & half a polystyrene ball covered decoupaged with Tim Holtz tissue paper and pom pom trim. Decorated with my current obession, Paper Smooches stamps! As the Challenge on the Paper Smooches Sparks blog is anything goes this week I would like to enter my little tree.

Thank you for looking today!

Nikki

Wednesday 20 November 2013

Lawnscaping polka dot challenge

Hi There!

I've been wanting to play along with a Lawnscaping challenge for quite a while but just have not had the time until now. As soon as I saw that the challenge was polka dots I knew I wanted to create a dotty skunk! I did this by stamping the skunk in black first, masking off the white bits and stamping over again with a dotty background stamp, he looks so cute! especially with glossy accents on the nose and eyes, the camera picked up the shine so well!
I'm not usually able to think out of the box when using my stamps so I am really proud that I used the log stamp from the same set to create a border round my card, next time I think I'll make sure I stamp in either all horizontally or all vertically though so the grain all goes in the same direction.

Thanks for looking today!

Nikki xxx

Tuesday 19 November 2013

Paper smooches colour challenge

Hey there!

I'm really glad that I managed to catch some decent light this morning to take a pic of my latest creation for the Paper Smooches challenge. It's one of those crisp, sunny Autumn days here in the UK, cold but utterly beautiful!

I was inspired not so much by the colours of the Paper Smooches Sparks cool shades colour challenge this week, but by the name of the pallette, 'giving thanks'. I have been desperate to ink up a turkey (or peacock) with my 'My Peeps' set and practice my masking! So I made a thanksgiving card, we don't celebrate Thanksgiving in the UK obviously but I do have a couple of American friends who I hope would appreciate recieving this!

You can't see on the pic, but I used glossy accents on Mr Turkey's eyes and his cute little Quaker Hat. I also had to colour all the little yellow leaves red to tie in with this week's colour scheme, a labour of love, lol!

I would also like to enter this card for the thanks giving challenge at simon says stamp

SSS blog

Thanks for looking today!

Nikki xxx

Friday 15 November 2013

A card with SSS sept 2013 kit

Hey there!

Just popping in to share a quick make with the september card kit from Simon Says Stamp.

It's a great masculine card and will be given to a very good friend of mine for his birthday. Loved making a rainbow with the banner stencil! It's a good job becuase I had to do it twice after messing up the stamping on my first attempt!

Here it is...

Thanks again for visiting!

Nikki xxx

Tuesday 5 November 2013

Paper Smooches trend watch challenge

Hi there!

I'd like to share with you a cute birthday card for one of DS2's little friends!
The cute crab is from Paper Smooches and the other stamps are from previous SSS card kits.

I would like to enter the Paper Smooches 'stripes' challenge this week.

Thanks for looking!

Nikki x

Monday 21 October 2013

Paper Smooches cool shades challenge

I've had this card in my head for so long, I'm glad it's finally on paper so I can move on to something else!
The background was made by dabbing a few different colours of distress ink (Peacock, Salty Ocean and Mowed Grass)onto an acrylic block, spritzing with water and stamping directly onto the card base. I then used the Paper Smooches Surf and Turf set to create an underwater scene using the colours from this week's cool shades challenge.

A pretty flat card when all's said and done but I couldn't resist using a bit of perfect pearls on the starfish for a tiny bit of texture!

TFL!

Nikki x

Thursday 26 September 2013

Playing along with Paper Smooches

Hi There,

Having discovered a great new-to-me stamp company that has such cute images and dies I've been scouring the web for lots of lovely paper smoochie inspiration. Plenty of inspiration that's for sure but UK availability? Not so much! Still, I managed to get hold of a lovely, bold woodgrain stamp and a FAB die. I can't get the stamp set I want, but until then there are a few feebie digis to play with which can be found here

I'm playing along with the Picture Perfect challenge this month, where you create a paper smooches project inspired by the picture. What struck me about this months picture was the neutral colours with a pop of pink, the CAS style and the concept of the butterflies being inside the jar. So this is what I came up with...


I hope you like it! Thanks for looking today!

Nikki xxx

ETA: check out the Paper smooches blog hop, comment to win open 'til sept 29th!

Thursday 19 September 2013

Some birthday cards

Hiya!

I thought I'd shared these birthday cards I made with you...

They were only quick ones though so it seems appropriate to make it a quick post too.
This one uses a freebie stamp from a magazine and the SSS card kit for August
This one uses the SSS september card kit and is for my 14yo niece

I hope they liked them! I hope you like them too :D

Adios!
Nikki xxx

Monday 16 September 2013

A little thank you goes a long way

Hi There!

Just a quick make to share with you today using Simon says Stamp September card kit. I made it for my Mom and Dad who had my 2 youngest overnight this weekend. It meant I could spend a little quality time with DS1 and do some activities which would have been so much harder with 2 pre-schoolers in tow *rolleyes* We went ice-skating and to the skate park & we both have the bruises to prove it!
I a little shaker card using an unloved sizzix book-plate die cut 4 times from thick card sandwiching an acetate layer between the 1st and 2nd layer, the tiny beads are nail caviar, I got several colours in 1 pack from a pound shop recently, such an incredible crafty bargain :)

I love how cute this card is and that I used an old product from my stash. My 4yr old loved the card's interactive qualities, I will have to make another one for him for his birthday!

Thanks for looking today,

Nikki xxx

Wednesday 4 September 2013

A Birthday Card...

Hey There!

I did this one for my Mum's birthday, made using the June 2013 kit from Simon Says Stamp
I had lots of fun creating the little, layered banner, I found some lovely inspiration on pinterest and I would love to a) credit it and b) see it again but ofcourse I didn't pin it to my own boards when I found it and I daren't tell you how much time I've wasted trying to track it down again! ;)

Brr! there's a nip in the air this morning, it seems that Autumn is on its way! Or perhaps it's been like that for a while and it's only because I'm getting up much earlier to get the kids ready for school now (sob!) that I notice it!

Nikki xxx

Sunday 1 September 2013

More cards with Simon Says Stamp (Sept 2013)

Hey There world?

You still with me? Jolly good!

Boy it's been tough fitting craft and computer time in during the summer holidays. I pretty much gave up to be honest, DS2 has not been sleeping well at all so it's been constantly up & down the stairs until gone 11 most nights :( I'm hoping starting FTE on Tuesday will tire him out, we shall see.

What a fabulous summer though, 2 weeks in glorious Southern France and a Bank Hol in an area of outstanding natural beauty that just happens to be 20mins down the road. I feel so lucky :)

I'm here to share a card from the latest Simon Says Stamp Card kit today. It's for someone going through a tough time at the moment...
it looks a bit washed out, the colours are a bit brighter IRL, but I did want the overall effect to be nice and subtle.

That's all from me today but I have more to share I'll try and squeeze in some more computer time soon!

Nikki xxx

Thursday 11 July 2013

Exciting news! and another card with Simon Says Stamp july kit

Hey there!

I can hardly believe I'm sharing this but my online shop went live today! How exciting (and scary) is that? Maria and I have been working together over the last few weeks to put together some of her designs in digi-stamp format. I do hope you'd do me the honour of swinging by and taking a look. If you have any thoughts, suggestions or comments I'd be really greatful for any input.

I have made a card with the latest Simon Says Stamp card kit and one of Maria's fab designs, fun to colour and great for boy cards, so much fun to make!

Image available here to buy!

I'll be back soon to share more fun cards made with SSS and Craft Sundae creations!

Nikki xxx

Monday 8 July 2013

Simon Says Stamp July kit - Some Cards

My goodness where does the time go?

I certainly don't get as much time to blog as I would like, I'm still creating though and I thought I'd show you a couple of cards I made with the latest card kit from Simon Says Stamp...


Do you like the cute little piggy? It's designed by Maria Diaz and will be available soon to purchase. Keep up with the latest news on Twitter and Facebook...that's all I'm sayin'! ;)

If you're still keeping up with me then I thank you, I will try to be a better blogger, I've got lots still to share if I ever get around to it! Or you could see what I've been up to here designing for Quirky Kits.

Ouf! It's to sunny to be sitting infront of the screen, hope you're enjoying some sunshine too!

Nikki xxx

Thursday 23 May 2013

A couple of Layouts to share...

Hello!

A couple of layouts to share today...

This one of myyoungest enjoying the trampoline...

And because I loved the colours so much on the first layout that I did another one to match, plus it was handy having all the supplies out ready on my desk. I'm getting more confidence with my inks and paints now so I thought I'd go to town (well subtley to town maybe!) on this layout of my eldest proudly showing off his new gappy smile, I must be gaining in confidence as this layout took me about an hour to complete :)

Thanks for your visit today, drop me a line to say you've been I'd love to return the compliment!

Nikki xxx

Tuesday 30 April 2013

My Happy place

Hi There!

What a beautiful day to share another Quirky Layout, I hope the sun is out where you are too! The sun was out when the picture for my layout was taken earlier this month, the first nice weekend of the year and we were lucky enough to be in our caravan. There is nothing that I like better than sitting outside enjoying the company of my friends, listening to all our children playing together and enjoying a beer...or two ;)

There is so much scope with Roly Poly to get really creative, I saw a tutorial on felt pompom flowers a while back and wondered if it would work with the denim, and guess what, it did! If you would like to have a go yourself here is the tutorial I used, there doesn't seem to be a direct link so you have to scroll down a bit but I promise you will enjoy the ride! ;) (I didn't sew it together though, I just used strong double sided tape to bind the fabric together and along the whole edge again when I rolled it up)

I used the packaging the kit came in to make a mat for my photo, after cutting it to size I punched one edge and folded it into 4 before cutting along all the folded edges again, I then arranged the 4 pieces haphardly before placing some of the tulle over the top and held it all together with a staple. This meant I had loads of room to tuck other pieces of PP in between the layers.
The triangles are a large square punch cut in 2, I used them to make photo corners too. I used my sewing machine to add texture to some of the triangles and the die cut feathers. I used distress ink to colour the little birds.

Did I miss anything? Is there anything you would like me to explain? If so then let me know in the comments, I would be happy to help if I can.

See you soon!

Sunday 28 April 2013

One of the best days ever

Hi there!

This is my third layout using the main kit from Quirky and there's still plenty left for other projects (well apart from the Alison Kreft Woodgrain, which got eaten up by disasterous craftrobo attempts, but more of that later...)

This is me smiling my head off because I'm having brilliant fun crab fishing in Aberdovey a few years ago. The crabs were a-bitin, the kids were squealing with a mixture of fear and excitement, and they were precariously close to falling off the edge of the jetty...


I took inspiration from a few places for this layout, as soon as I saw this gorgeous Layout I knew I wanted to do my own version of it and this cute little idea was going to appear somewhere too. Plus I've been trying out a few new techniques, I've diligently been practising the cursive style of handwriting over the past few nights because I always think my writing makes my layouts look untidy, there's a way to go yet but I'll keep practising! Of course I couldn't go without telling you the rest of the robo saga, after finally pulling Mr Robo out of retirement (he's been languishing in a cupboard for about 5 years after failing to get to grips with him first time round) I failed miserably cutting my title with the Websters PP that I wanted to use. In the end I used copy paper, less tears (that's tears, not tears... you know, the ones that fall down your face...) if it all goes pear-shaped, and I still had to cut out all the little holes myself! Will keep practising with my robo too, there's always something to learn with this fantastic hobby isn't there?

Again, any questions you have about the layout please leave it in the comments and I'll be happy to answer it for you.

look forward to hearing from you!

Nikki xxx

Friday 26 April 2013

When did you last use your Stampboard?

Have you still got some at the back of a drawer? I hunted mine out the other day, I bought some caviar beads from a pound shop recently (12 colours! in little glass vials! One Pound!!) and I wanted to use them. Not having a melt pot, (I really want a melt pot but I know I'll never use it *rollseyes*) my thoughts turned to those little squares and rectangles that haven't seen the light of day for many a year and I made this...


You can get an idea of scale from some the products I used for this little make. It really is quite tiny but I like working in small scale especially when I'm trying out new techniques or experimenting.

You can just see the caviar beads set into the clear embossing powder on the stampboard image, it was the very devil getting them to stop blowing about with the heat tool, but I managed (all the while wishing I had a melt pot!) and then added a few dabs of acrylic pearls for a bit of extra colour. The butterfly wings were stamped onto acetate and glittered from behind before being attached to the back of the image.

I expect it'll be a while until Mr stampboard comes out again but don't worry, like the sentiment on my project, you are loved!

Thanks for visiting!

Nikki x


Friday 19 April 2013

Blog Hop Winner!

Hi there!

I'm pleased to announce the Blog Hop Winner picked at random was number 51 - Jane (Cassia)

Well done Jane and thank you to everyone else who commented.

Nikki xxx

Wednesday 17 April 2013

The Grasshopper Hunt

Hi There!

Woo Hoo!! after an amazing Blog Hop earlier this week I'm super-motivated to create and after getting such lovely encouraging comments I may try to do more tutorials in the future. I'm also celebrating reaching over 10,000 pageviews! {I reckon about 5,000 are just me looking at my own blog though ;)}

Don't forget, you have until midnight 18th April to comment on this post to be in with a chance of winning this candy...


So here I am back to share another Layout with 'A Pocketful of Posies'. At first glance this Kit seems to have pink predominantly running through it but this time I managed to make a layout without using any!

I chose a sunny pic of my 3 gorgeous boys intent on their hunt for Grasshoppers in the fields of Brittany last year. The story is hidden in the pocket behind the photo, I love hidden journalling because I never think my handwriting looks right on the page!

I made use of the fabric leaves and wood veneers to embellish the page, covering the veneers with patterned paper as you can see here..

I hope that you se something here that inspires you today and if you have any questions please do so in the comments and I'll do my best to answer them.

Can you use your kit without any hints of pink? If you do I'd love to see them!

See you soon,

Nikki xxx

Monday 15 April 2013

UKS Blog Hop!! Adding Layers and Dimension

Hello everyone!


Welcome to the UKS Spring BlogHop! You may have come to me from PaperCollecter Anon

If you lose your way, or have dropped in on me directly and want to follow the hop, you can see the full list with all the links here

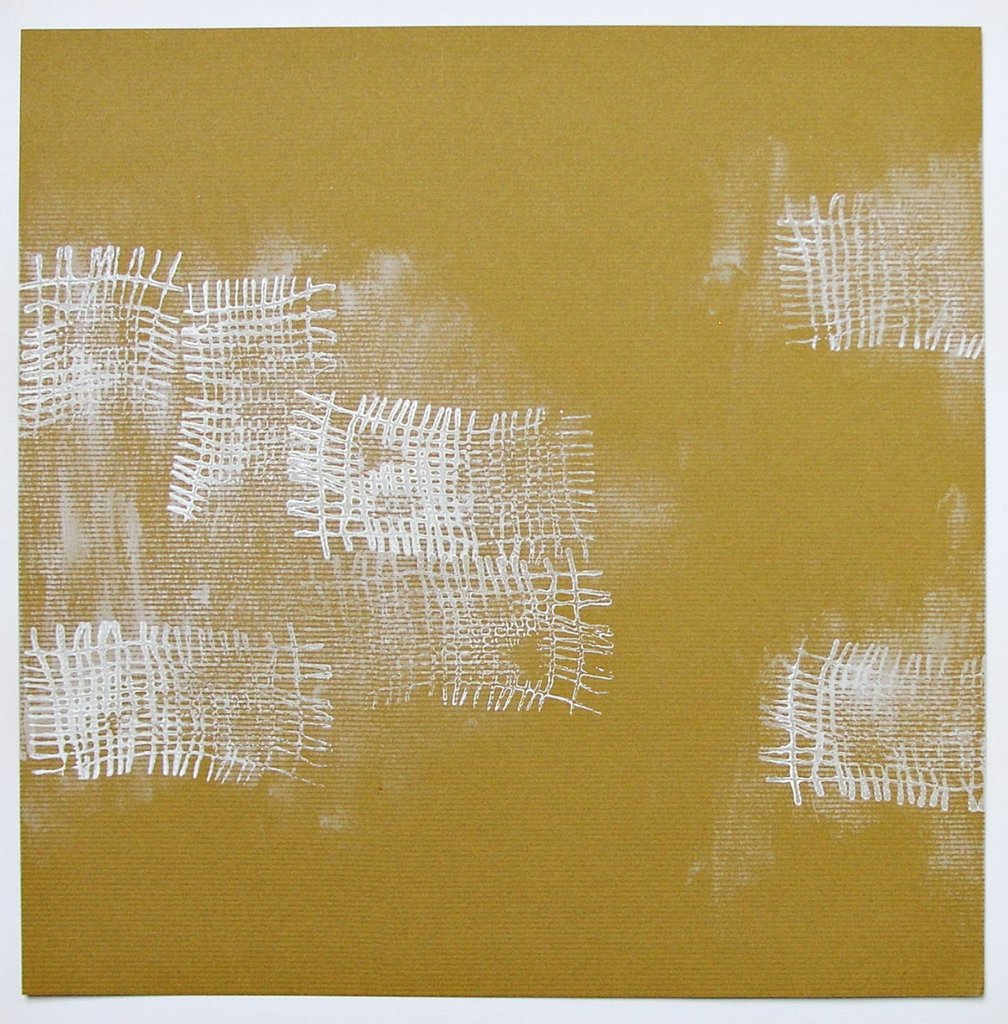
Ever wondered how to get from this...

... to this?
I'm here today to share my process for adding layers and dimension to a scrapbook layout. I'm sure there are hundreds, if not thousands of other ways, but this is how I do it and if you manage to gain something useful here today it would make me very happy!

So, I started my first layer by rubbing over the cardstock with white acrylic paint where I expected the embellishments and photo to go. I tend to have a sketch in mind when I start a project although I'm pretty flexible and sometimes the end result is far removed from the original idea! to create more depth I overstamped the painted area with a background stamp with more acrylic. I try not to worry too much about how it looks at this stage because a lot of it will be covered up anyway.

Now to start adding some paper layers... my layout has a border top and bottom and along one side, I cut my strips ready and do a little inking and 'lifting' of the paper with my fingers to stop it looking too flat on the page...

I use the same process for adding layers behind my photo, I don't think about the size of the paper too much, just adding scraps and offcuts of coordinating papers in a way that pleases me and if I like it? I stick it down! (or I would be there for hours shuffling paper *rolls eyes*) HOWEVER... I only stick down in places that will still enable me to lift the edges of my papers and tuck more things in should I need to. Can you see the difference using your fingers to gently curl the edges of the paper makes to the overall look of the photomat?

Now for the fun bit! Notice that I haven't actually stuck down my mat yet, I still like to have a bit of 'shuffle-space'! I've added more depth by using the negative space from a scallop circle die cut, with a little PP peeking through behind and a fussy cut flower raised with popdots over the top. I've echoed the banner diecuts on the photomat with more banners in the top corner.

Nearly finished, but the layout needs more contrast so a bit of black stamping and ink spattering is required (that's another reason why I don't stick the mat down!, a few extra embellishments (yup, I stuck a bird on it!)and a bit more woodgrain tucked in here and there to help tie everything together.

So, just the title (and a few more twiddly bits...) to go! If you've managed to stick with me for this long then thank you for your patience. I do hope you found this useful and it has given you some ideas how to create layers in your own projects. The PPs I have used for this layout are all from the latest Quirky Kit from Crafty Templates.
The next blog on the hop is The House of Bears thank you again for visiting and I hope you come back soon!

Please comment on this post by midnight 18th April if you would like a chance to win this...

I will pick a prize at random and post the results in my next post.


Nikki xxx

Wednesday 3 April 2013

Things that make you go Brrmm!

Hi There!

I sort of took an unintentional blogging break there didn't I? No reason, just haven't done a great deal to blog. I've done a bit of Art journalling, I'm trying to improve on my drawing skills, still a long way to go yet so not something I'm ready to share just yet!

I do have something to show you today though, a sketch challenge layout I did for the Studio as a guest designer. I really enjoyed playing along, thank you very much for having me!

I had a play with my inks for this layout, letting them blend together a little bit before drying them with a heat gun. Here is a closer look first...


And a look at the full layout...


Thanks for visiting! Do come back soon as I will be taking part in a UKScrappers blog Hop on the 15th of April and showing some layouts made with the latest Quirky Kit. I was immensely honoured to be asked to become a permanent DT member for Quirky Kits and ofcourse accepted in a heartbeat!

So, see you soon? Hope so! xx

Monday 4 March 2013

The Studio Recipe Challenge

Hi All!

I was flattered to be asked to guest design for The Studio this month and their first March challenge was a recipe.

Kraft cardstock

Tags

Paint or Mist

At least to different Alphas

Here's what I did

I've been playing with my DLSR lately, trying to get off auto and use manual. Man but I've got a long way to go with that! I was quite pleased with these rather over exposed images that I got of DS3 in the end, his eyes look nice and sparkly and his hat looks so cute!

I enjoyed creating the layout too, I've had a tag from a Christmas gift that I've been saving because I knew I wanted to put it onto a page, it was pre distressed, embroidered and printed with cool phrases, It's almost worth getting a new top to get another tag, lol!

Lots of layers again, just love how this makes my pages look, got all trendy with arrows and vellum too, nothing's to good for my l'il son shine eh?

Thanks for visiting! I'll be back soon with more for the studio. Hope you have a chance to play along too xx


Friday 1 March 2013

Uniquely You, just for me

Hi Folks!

I haven't posted anything for a while but I have been crafting, I made some more samples for the recent NEC trade show, never got around to taking any pics though!

I was glad to get back to some scrapping and having taken delivery of some rather splendid papers from that rather splendid paper company ILS I really wanted to create. My love affair is such that actually cutting into said papers almost caused me physical pain! I've come to the conclusion though that there's really no point in 'saving' special stash,we buy it because we love it and want to use it, so flippin' well use it girlfriends!!! True Dat... :D

enough ghetto speak, I'm far too old. Onto what you've really come for, the layout...


there's actually a mix of PPs used here, both new stash and old, some very old that I've been hanging onto because it's 'special', well no more I tell you!

I think you've got the point now.

Thanks for visiting! Do drop me a note so I know you've been, I love knowing who's come by to take a peek!

Nikki

Sunday 27 January 2013

My Foxy Valentine

Hiya! I had a fancy to make a valentine card for my OH. I didn't want it to be too cutesy, I wanted to do some paper piecing, I wanted to put a fox on it. Fortunately googling paper pieced fox came up with a few options, notably this. Now I love Jo Kill's work, I used to buy paper craft inspirations regularly and found her cards & toppers so inspiring, her blog is here if you fancy a look.

So, I think this card fits the brief don't you?

I'm not sure why blogsy has seen fit to squash the picture so, if you click on it the perspective corrects itself, lol!

edited to add: Ack! Couldn't stand looking at it like that so have cranked up the 'ole PC! Much better :)
See you soon!

Nikki xxx


Wednesday 23 January 2013

Our local pleasure beach

Hi There!

I rustled up another LO to play along with a challenge on UKS and thought it would be nice to share here too. The challenge was one of contrasts, light/dark, hot/cold, new/old. So I used warm & cool colours, a photo of DS1 taken into sun which put him into silhouette while at the same time catching all the light on the water and new and old stash. The vellum was one of my first ever purchases from HobbyCraft and the shaped paperclips were a steal from my local discount shop!

We live in the landlocked midlands but close by there is a reservoir that I often take the children to when they need to run off a bit of energy. They love to go down to the water's edge and throw stones in, the bigger splash the better!

So, here is the layout
And here is a close up of the picture

I used a page kit from Crafts 4 Eternity and really all the work was already done for you on the papers so it a page that came together quite easily once I'd decided where to put the hexagons! It's fab getting new scrap supplies each month to play with and at £18 incl P&P for a 4 month subscription, great value for money!

I hope this post finds you well and not too snowy! Where I live there's been a good solid covering since Friday and it just seems to keep on coming! Stay warm & drive safe,

Nikki xxx


Thursday 10 January 2013

Funny Face

Hello!

I'm back with a Quirky Kit main kit/lite kit mash-up to share today. I took these snaps of DS3 just the other day, he looked so cute clutching his teddy with his fingers in his mouth! I printed the picture off in black and white so I had total freedom with my colour scheme. I used ILS pops of PP for the base from the main kit & stenciled a chevron border in mustard seed to tie in the yellow photo mat which is a journalling card from the EP PP in the lite kit.
Here is a closer pic so you can see the layering. Theresa Collins for the ripped paper, a kraft tag, a little EP mint stripe and more of the EP journalling cards cut up and used in various different ways, including for the title. I couldn't resist dipping into a previous kit for the star punchinella, it really helps the photo stand out I think! The punched out circle is a scrap of ILS paper I had left over from a previous layout.
You can see here how I used the Studio Calico letter stickers,die cut arrows, cirles and stars from scraps to embellish along with a few drops of weathered wood distress ink. The way I tend to work is I design my photo mat first and stick it together without sticking it onto my base. I then ink and spatter the base after I have decided where I want to put the mat. After the mat is fixed to the page I can add any other embellishments I want.
I have used the fabulous ScrapFriends sketch to make this layout here...

Thanks for looking!
Nikki xxx

Saturday 5 January 2013

If the cup fits...

Hi there!

I hope you all had a wonderful Christmas and New Year. So are you feeling rejuvenated and ready to papercraft your way through 2013? This is my first project of the new year, may it be the first of many!


I LOVE hot chocolate, but it has to have all the trimmings or it just isn't the same, and that includes a pretty cup to drink it out of! For the base of the layout I used ILS 'pops of #3' paper and a strip of AC 'cozy court' along the bottom. I stippled blue distress ink over a chevron mask and spattered brown ink over the stippled areas.


The clouds are die cut out of 'cozy court' and punched with a little star so that you can see a glimpse of PP underneath, they have been raised on pop dots for a little dimension. You can also see I've used little dots of perfect pearls here and there for an extra touch of sugar!


I used glitter foam to make brackets to frame my photo and for my title. Whether you're using a die cutter of craft knife, this foam cuts like butter! You can see also how I added a little touch of scrapping floss and a few sequins.


Here's a closer look at the title and you can just see the star embellishment with a diamante flat back in the centre. You can also see all those layers, lol!

The sketch is taken from ILS


So, I hope this layout hits your hot spot and I will be back with another page soon, Happy Scrapping!

Nikki xxx